Weather Page
Depending on the particular method that was chosen in the previous (Location) page, the user has different options available when choosing the weather. Only the options that are actually available to the user (depending on the method selected) will show up as selections. Once the user has selected a method for weather information selection, the user will need to select the period to simulate, or the time period for which the user would like to perform the simulation.
Selecting Weather Information
There are three different methods to select the weather information.
Weather Station Using PRISM Data
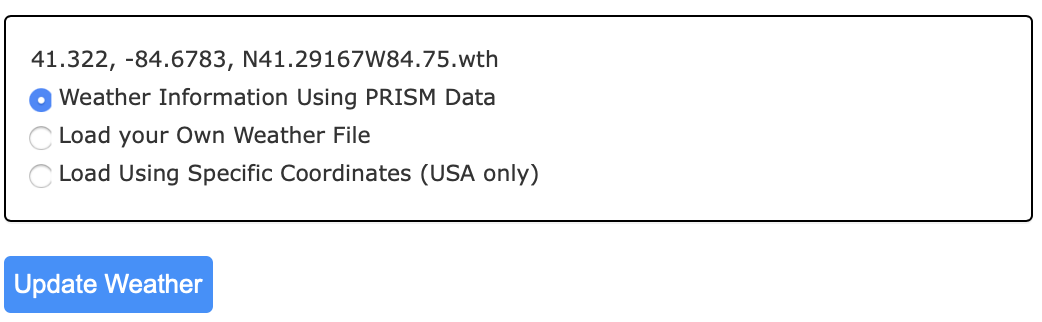
This method takes weather data from a weather station inside or near the State/County that was selected in that page and uses that data to do the simulation. First the user must select Weather Station Using PRISM Data and then select Update Weather and continue to the next page.
Load Your Own Weather File
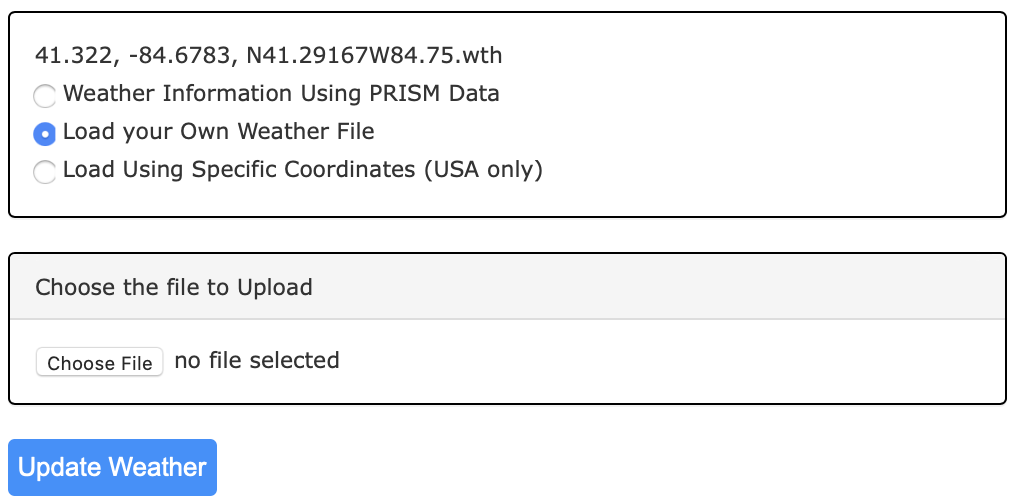
This method of weather selection is always available regardless of the method used for selecting an area of interest(AOI). This option is also the only option that is available when using the NTT tool for locations outside of the mainland United States. To use this method, please follow the instructions below:
-
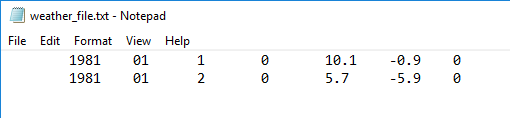
Create a Weather File: In order to upload a weather file, the user must first create one. The weather file needs to be in a text file, and it should have the following format: blanks (columns 1-2), year (columns 3-6), month (columns 7-10), day (columns 11-14), solar radiation (columns 15-20; could be blank or zero), maximum temperature in Celsius (columns 21-26), minimum temperature in Celsius (columns 27-32), precipitation in millimeters (columns 33-38). This is for the first year/month/day as shown in the figure below.
The same pattern is used for the rest of the days that you want to add to the simulation. Specific weather information for each day can simply be added by adding new records. Each record should contain the weather information for a specific day.
The information above, for example, would show weather information for January 1, 1981 (where the solar radiation was 0, the max temperature was 10.1 degrees Celsius, the min temperature was -0.9 degrees Celsius, and precipitation was 0.00 millimeters), and the weather information for January 2, 1981 (where the solar radiation was 0, the max temperature was 5.7 degrees Celsius, the min temperature was -5.9 degrees Celsius, and precipitation was 0.00 millimeters). Ideally, you would have a file that contains detailed information for the weather for an extended period. This would look like the following:
Even though the file is significantly larger, all of the days for which we have data follow the same format.
-
Upload the Weather File: Once the weather file has been created, the user needs to upload the file to the NTT program. First the user needs to select the Choose File button to select a file to be uploaded. This will open a file explorer window where the user can search their computer for the weather file. After you have selected the file, click Open. A progress bar will be displayed as the system uploads the information.
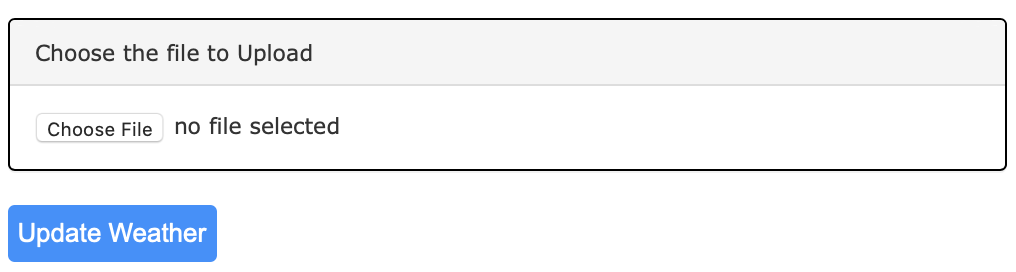
The records will have been uploaded when 100% of the records have been uploaded, and a green message will come up on the top of the screen . Once this has happened the user needs to select the Simulation Period (which is explained below under Period to Simulate) and then click Update Simulation Period. Then the user can click Update Weather to save the information and the Continue button to advance to the next page.
NOTE: It is important to note that when you click Update Weather after uploading a weather file, the weather information is saved temporarily for the current session. This means that the weather information from uploaded weather files IS NOT SAVED when you save the project. Because of this, after opening a saved project where the user previously uploaded the weather file, the user needs to upload the weather file again, and to ensure that the simulation results are accurate, run the simulations again.
Load Using Specific Coordinates (U.S.A only)
This method of weather selection will always appear as available regardless of the location method that was selected in the Location page (this method will work for the User Input method). However, the coordinates selected must be coordinates within the United States. This means that while the option will appear as available if the user selected “User Input” in the Location page, if they are looking at an area of interest that is outside the mainland United States, an error message will come up.
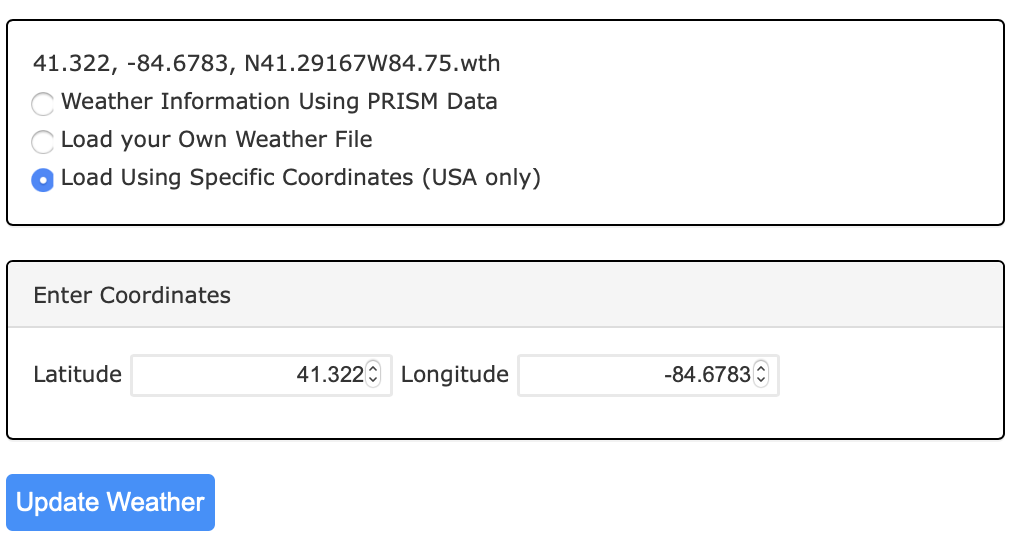
To use this method, first select Load Using Specific Coordinates (U.S.A only) and then enter the desired coordinates. You will (like in all the other methods) need to select a period to simulate (which is discussed below) and after this has been done, you can click Update Weather to save the information and the Continue button to advance to the next page.
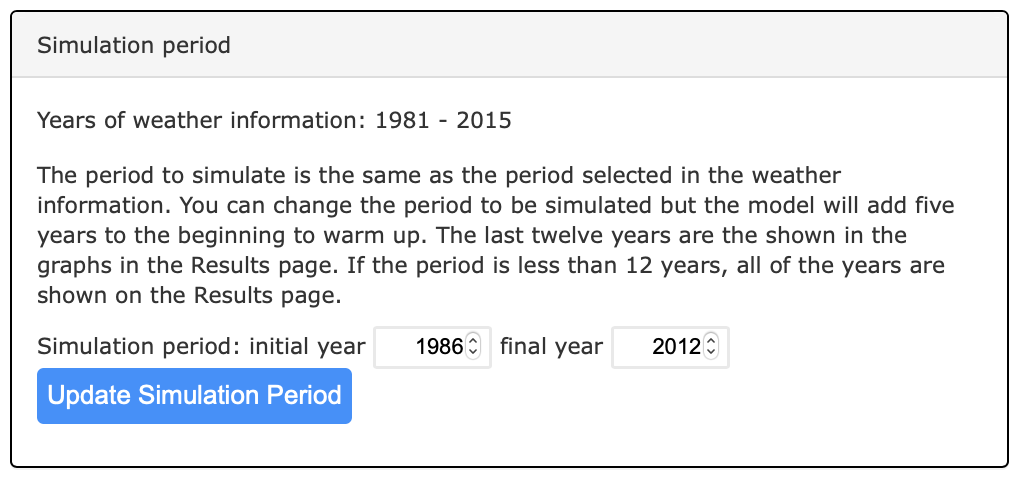
Period to Simulate
The period to simulate tool allows you to select the number of years that you would like to simulate. You can type in the years that you would like to simulate for, as shown below. However, the program will simulate five years before the year that you selected as a method to warm up and give the user more accurate simulation results. Because of this, the user must select a start year that is at least five years after the initial year for which weather information is available. For example, if weather information is available from 1981 to 2012, the user must select a start year for the period to simulate that is 1986 or later. In the Results page, the last twelve years that are simulated are shown on the graphs. However, if there were less than twelve years in the Period to Simulate, then all of the years are accounted for in the graphs. The Simulation Period information is required for all weather options.