Soils Page
After clicking on a field to begin editing on the Fields page, the user will be directed to the Soils page. The Soils page is a field-level page. The Soils page allows the user to rename the field and adjust the acres; and verify, modify or delete soils returned from the SSURGO soils database and add/edit layers for the particular field selected in the Fields page. NTT returns a maximum of 3 soils for every field. These soils represent the most predominant soils in the AOI. NTT is limited to 3 soils in order to minimize model processing time.
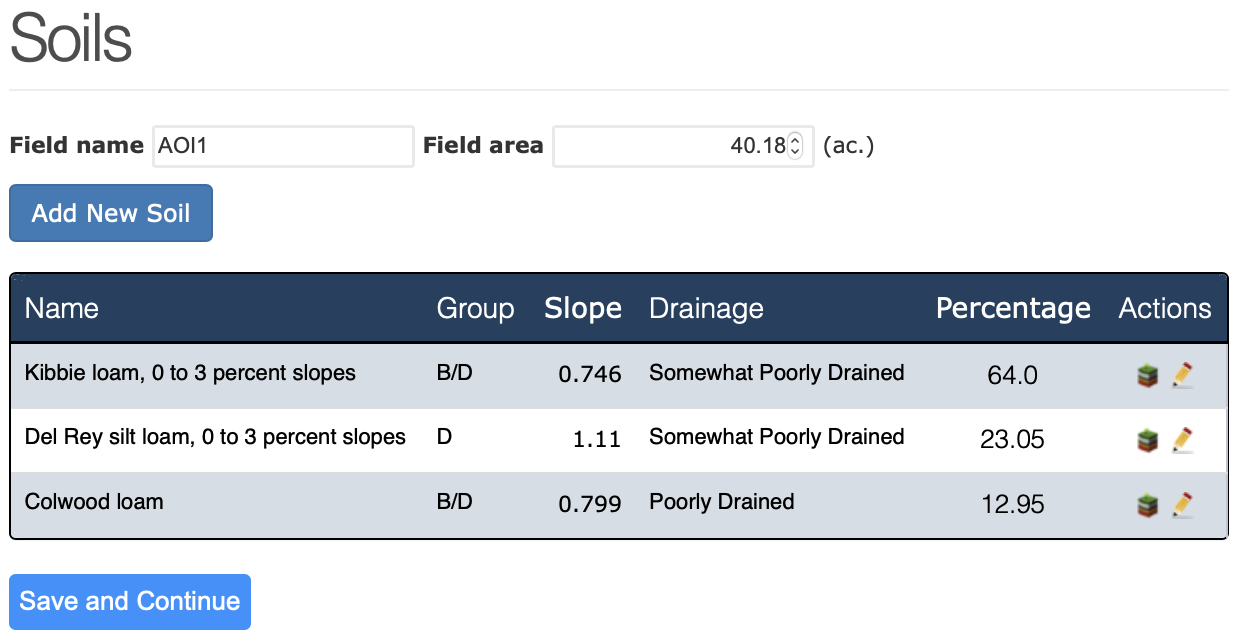
Field Name/Area
Field Name: The name that the user has given to the AOI is pre-filled here. The user may modify the name if they wish. The new name will be updated on the Fields page as well.
Field Area: Field area displays the calculated area of the field in acres. The user may refine this value if needed.
Manage/Modify Soils
Between 1 and 3 soils will appear in the list of soils returned for your field. These represent the most predominant soils in your field as returned by the SSURGO Soils database.
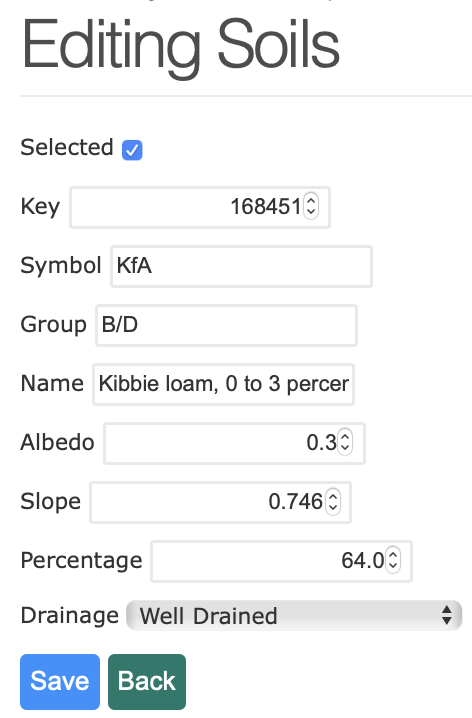
NTT will return the soil name and the soil group for each soil. This data is derived from the SSURGO soils database.
The soil slope for each soil is calculated dynamically by NTT using the 30 meter Digital Elevation Model (DEM) layers associated with your field.
The default soil organic matter (%) value returned by the SSURGO soils database is displayed for each soil in the soils list. However, if the user has more precise data they may enter it here.
Percentage represents the adjusted coverage area of the soil for your field. Because NTT selects only the 3 most predominant soils, the coverage area of each is proportionally expanded to equal 100% coverage of the field.
Users may Add new soil(s) by clicking the button Add New Soil.

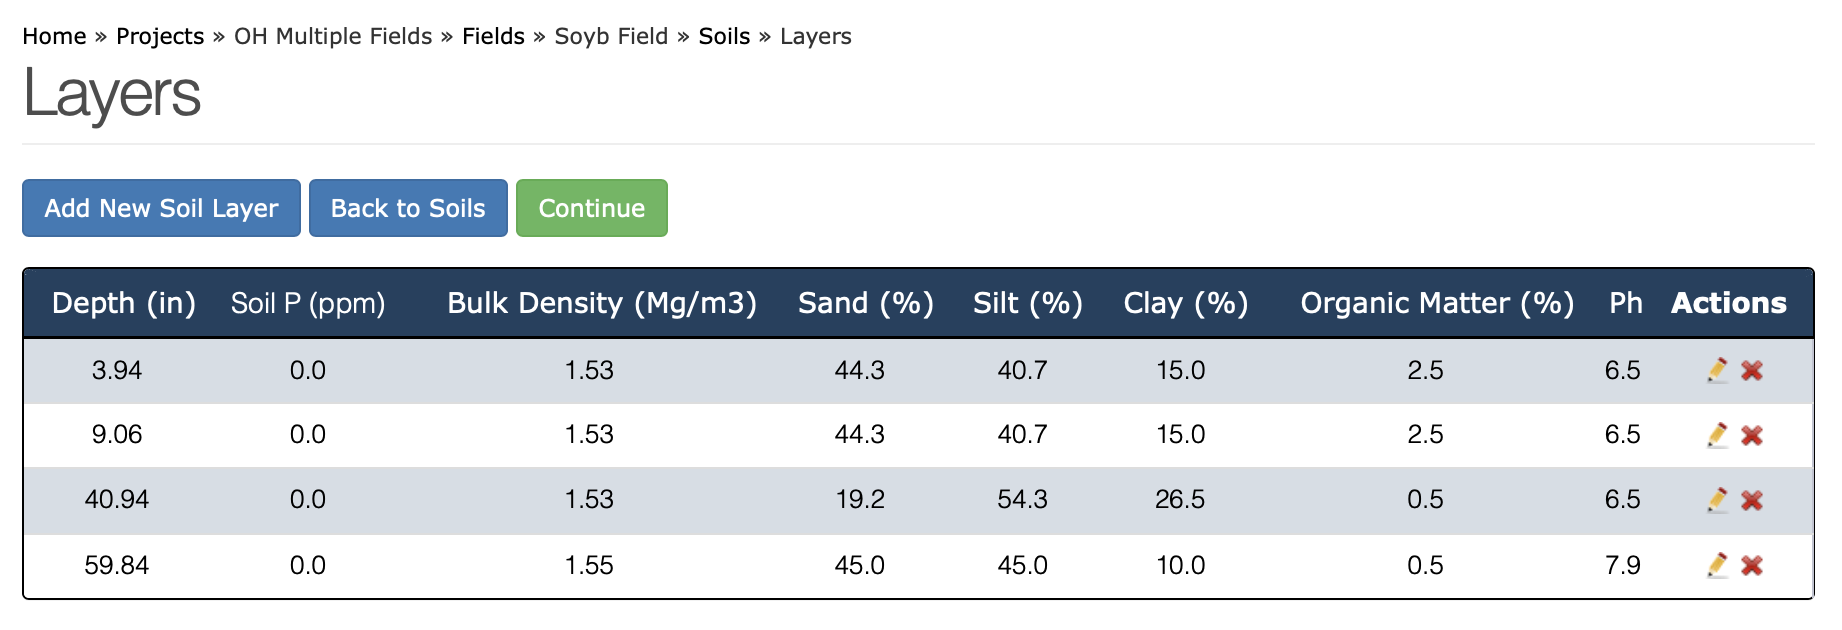
Users may add/delete soil layer from their soils list if they do not wish for it to be used in the model run. To get to the Layers page for a particular soil, simply click the ![]() icon in the Actions column of the soil you wish to add/delete layer from.
icon in the Actions column of the soil you wish to add/delete layer from.
Users may edit soil from their soils list if they wish to change some values. Simply click the ![]() icon in the Actions column of the soil you wish to edit.
icon in the Actions column of the soil you wish to edit.